All happiness depends on a leisurely breakfast. ~John Gunther
Showing posts with label vegan. Show all posts

Wednesday, December 3, 2008

white vegan chili (with cheese)

today I decided to peruse simply recipes, a blog that we've featured here before. I was collecting recipes for a work project right now, but all the recipes have to appeal to folks who a) eat meat, and b) don't really want to change their eating habits but know that they should be eating healthier food. so I do a lot of retyping and formatting recipes for "quick beef casserole," and "baked southern fried chicken." a few hours of that and I just want to think about what I'm going to cook for myself, not what would lower a person's high cholesterol (which I don't have).


this here is a white bean chili that was intended for turkey but I went in the other direction. I upped the garlic and the onions and used some red chili flakes. it's yummy. not too spicy, but a lot of flavor and I froze heaps of it for the winter.

you will need:
  • 2 cans of cannelloni beans
  • 3 cups vegetarian chicken broth
  • 3 cloves garlic, chopped
  • 2 medium onions, chopped - keep each onion separate!
  • olive oil
  • 1 teaspoon ground cumin
  • 1 teaspoon oregano (recipe called for dried, but I used fresh and it was fine)
  • pinch of ground cloves
  • pinch of red chili flakes
  • 2 4-oz cans chopped green chilies - mild or hot...or both!
  • 1 package tempeh
  • salt to taste
you will do:
  • add the beans, the no-chicken stock, garlic, and 1 chopped onion (because you separated them) in a large soup pot. bring it to a boil, my friends.
  • while the stock is boiling, heat the olive oil in a saucepan over medium heat. saute the onions until it's tender.
  • add the green chilies, tempeh, and the spices and mix the whole thing up. cook for 5-10 minutes.
  • add the chili-tempeh stuff to the soup pot. stir it in and let it simmer for a while with the top off.
  • the chili will thicken during the simmering process. keep an eye on it so that you can achieve your ideal consistency. for more of a soup, simmer for 5-10 minutes. for more of a chili/stew, simmer for 10-15.
  • then, if you're a lapsed lactose-intolerant like myself, you put some into a bowl and sprinkle sharp cheddar on it. oops.

Sunday, October 12, 2008

chili!!!


I wrote this in August, and I have been waiting for the pictures. Of course, there are 100 pictures, so you will have to go look at them here! You will get to see pictures of the farm, the farmer, the farm tour, the beautiful jewelery and glasswork at the farm, and then our trip to Northampton on the way home.

And now, the post I wrote:

Stone Soup Farm is having their chilifest for CSA members today, and so we had to make some chili. I woke up with the vague idea that I should only use things we had in the house - farm share vegetables and random beans, basically.

I used a heavily modified version of this recipe: http://www.famouschilirecipes.com/ThreeBeanChili.html

Basically:

Chopped two onions (one was huge)
seeded and minced one hot pepper (from the farm share!)(gina marie dealt with this, it required emergency wheat thins)
chopped two green peppers (from the farmshare!)
chopped three little carrots (from the farmshare! - it turns out we also had a very big yellow carrot, but I thought it was a parsnip so we missed out on that.)
minced a lot of garlic (from the farmshare, gina and sarah joint effort)

All of those things went into the pot with a little olive oil and simmered for about 5 minutes.

then I added a can of old bud light.

*then* I added three farmshare tomatoes that I had chopped, and a can of diced tomatoes from stop and shop

Then I added two cans of kidney beans and a can of canellini beans

also, we added some corn from the farmshare - roommate emily dealt with this.

this is all stirring and cooking the whole time

finally I added 1 tablespoon of cumin, 1 tablespoon of chili powder, and 1 tablespoon of smoked paprika (my favorite spice)

finally, a can of refried beans stirred in to thicken things up. Then I let it bubble for 15 minutes.

Finally, lid on and into the insulated bag to head out to western mass!

pictures are coming...

Sunday, August 24, 2008

red lentil dhal

this recipe is so good that I sometimes find myself fantasizing about it and then I know it's time to whip up some dhal again. I originally got this off the Post Punk Kitchen website (see our links), so all credit needs to go to the amazing Isa. not only does it taste deee-lish, but I get to use my mortar and pestle! hm. both of those words look like better Scrabble words than they really are.

you need:
  • 3 tablespoons peanut oil
  • 1 medium yellow onion
  • 1 tablespoon fresh ginger, grated
  • 4 garlic cloves, minced
  • 1 teaspoon salt
  • 1 cup dried red lentils
  • 2 tablespoons tomato paste
  • 4-5 cups water or vegetable broth
  • 5 plum tomatoes, chopped
  • juice of 1 lime
  • 1 cup fresh cilantro
  • SPICE BLEND:
    • 2 teaspoons mustard seeds
    • 1 teaspoon fenugreek seeds
    • 1 teaspoon coriander seeds
    • 1 teaspoon cumin seeds
    • 6 cloves, whole
    • 4 cardomom pods
    • pinch of red chili powder (or more?)
    • 1/4 teaspoon ground cinnamon
you do:
first you toast all members of the spice blend - except the red chili and cinnamon! - in a saute pan over medium heat. stir frequently for about 5 minutes and then remove from heat. put all of the spice blend (including the missing duo) into your mortar and pestle and grind to a fine powder.

I'd like to make two notes at this point:
  1. you can also use a coffee grinder to blend the spices. this is fast.
  2. if you do decide to go the Amish route, have some good reading on hand. I chose the music issue of the Believer.
add oil to a soup pot and turn up to medium-high heat. add the onions and saute for five minutes. then add the garlic and ginger and saute for another five minutes. you'll want to stir fairly often so that nothing gets stuck to the bottom of the pan. add the spices and salt and then saute for five more minutes.
pour 4 cups of water and stir fully to deglaze the pot. add the tomato paste and the lentils. bring the pot to a boil and then lower the heat. leave uncovered and allow to simmer for 20 minutes.


hm. that doesn't look quite amazing yet. actually looks a bit like I'm making pizza in the bottom of a soup pot. must be time to add the tomatoes, lime juice, and cilantro! (if your dhal is too thick, you can add more water, but this has never happened to me.) let the whole thing simmer for another ten minutes and then you're good to serve. and your whole home will smell incredibly and you tastebuds will thank you. you can serve it on rice or plain.


I cooked up some potatoes and tempeh in the sauce pan I had used for toasting spices and added some garlic powder. it was a good complement, unless you don't eat tempeh.

I have forgotten nearly every ingredient in this recipe at one time or another and it's always tasted incredible. frequently I don't add the red chili. sometimes I skip out on the cinnamon. tonight I forgot the lime juice, but since that's pretty much in the last step, the dhal was already great by that point. I was about to make some sort of generalization about skipping ingredients added in the last ten minutes, but I realized that kind of attitude would land my sorry arse in detention should I try it in potions class. and clearly, if something doesn't work in Harry Potter, then it's not applicable in real life either.

Wednesday, August 13, 2008

vegan blueberry grunts

As I threatened, I made the blueberry grunt featured in a recent post on VeganYumYum. I followed Lolo's recipe basically to a T, so I am not going to reproduce it here except for changes, suggestions, etc.


I made the one-big-grunt-steamed-in-a-pan version. Not as cute as the individual grunts, but I think less work. They came out pretty well - well enough that gina marie, roommate emily and I all cleaned our plates. I think that next time i will make smaller "pieces" of grunt though, not cook the blueberries down so much, and maybe have a higher berry to dough ratio.

the wet stuff... I had two plastic boxes of blueberries, and gina marie had a handful of leftover raspberries and strawberries and I popped those in too.


berries simmered for about 20 minutes - probably a little too long. I guess I thought they needed to be really thick to hold up the biscuit. Not actually true!


My attempt to "cut" in the earth balance. I mushed it as best I could with a fork and then put it in the fridge.


added the soymilk - I only had unsweetened vanilla, so that's what I used. I should have taken my rings off first.


really should have taken off the rings. I maybe shouldn't have used my hands because hands are warm, but I wasn't sure how else to manage it without overmixing.


this was tricky, I had no idea what I was doing - I should have followed instructions and made *bite-sized* biscuit pieces, but they were so sticky!


it was weird looking, but pretty.


lid on! no peeking - except I have a clear lid!


and done


done


done!

Monday, August 11, 2008

august blog number two - veganyumyum and lolo

I was at a fantastic birthday party for Ms. Chloe the other night, and I met a famous vegan foodblogger. Lolo's blog, VeganYumYum, is pretty right on. She has lots of beautiful pictures of vegan baked goods and other animal-free food including special cupcakes for knitting night (she was totes on Martha Stewart) and something called blueberry grunts - which I am dying to make, both because they look awesome, and because I am committed to making all kinds of cobbler-family desserts in a vegan way.... (see my blueberry buckle of 2007...)

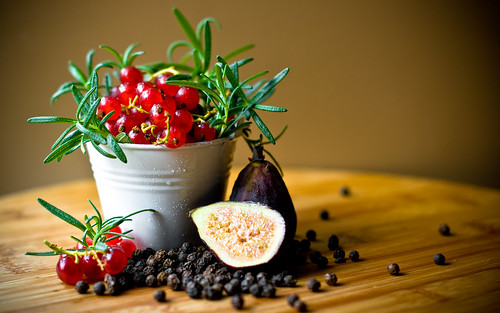
Since VeganYumYum doesn't have a logo, I am including the latest post's gorgeous picture... Lolo says that she wants to do something with red currants and peppercorns! I am waiting excitedly to see what she comes up with next....

Thursday, June 19, 2008

warm? rice salad

Inspired by Antonia on Top Chef, a funky recipe on 101Cookbooks, and the beautiful, beautiful lettuces that I got in the first farmshare distribution yesterday, I decided to make salad. With rice.

First I put on the rice - I picked a wild rice/red rice blend. It takes about an hour to cook, so be read to be in it for the longhaul.

While the rice was cooking, I prepped the rest of the cold parts of the salad:
Several large handfuls of greens from Stone Soup Farm, a sliced orange sweet pepper, a handful of chopped cilantro from the farm, a halved and sliced avocado.

then I put a little olive oil in a skillet and put a peeled and sliced kohlrabi and two sliced summer squashes (all from the farm) in on medium heat for a few minutes, until they were still firm, but cooked.

Finally, I made dressing. 2 shallots diced finely (from last years farmshare), olive oil, aged white wine vinegar, a big dollop of Grey Poupon, and salt and pepper. Just keep messing until it tastes good. - usually you need either more vinegar or more salt.

When the rice was down, I stirred it in its pot to let it cool enough that I could touch it, and then I put half the rice and half the hot veggies in the salad bowl and poured all the dressing over it. Finally, I tossed with my hands. And then added more rice because half the pot wasn't enough.

On the plate, adding some parm was a nice addition. Best eaten outside while drinking red wine.

(also, I am going to try it cold for lunch today ... wish me luck!)


Monday, June 9, 2008

hot apple pie muffins

yesterday it was in the mid 90s here in Cambridge, MA. it was, in other words, the perfect day to put together Ikea furniture and paint it. after I completed one dining room chair, it was clear that the paint mixer at my local hardware store had misinterpeted the color sample I had picked out. instead of spring green, the chairs are the furniture equivilent of little green men. with three out of six chairs assembled and painted, I decided that the hot weather should be used more appropriately. it was time to bake. here's the recipe for hot apple pie muffins, so named because they were apple and I was hot.

for muffins:
  • 1.5 cups flour
  • 1/3 cup sugar
  • 2 tsp baking powder
  • 1 tsp baking soda
  • 1 tsp ground cinnamon
  • 1/2 tsp ground allspice - I had none, so I used pumpkin pie spice
  • 1/8 tsp ground cloves
  • 3/4 cup apple cider - I had none so I used water
  • 1/3 cup canola oil
  • 1 tsp vanilla extract
  • 1/2 cup grated apple
  • 1/2 chopped apple
for topping:
  • 1/4 cup whole wheat flour
  • 1/4 cup brown sugar
  • 1/2 tsp ground cinnamon
  • 1/4 tsp ground allspice - again, I used pumpkin pie spice
  • pinch of slat
  • 3 tbsp canola oil

preheat the oven to 375 degrees and lightly grease a muffin tin.

topping goes like this: mix together all the dry ingredients. then pour in the oil one tablespoon at a time. in between tablespoons, mix the ingredients with your fingers to get it crumbly.


muffins go like this: sift the flour, sugar, baking powder, baking soda, spices, and salt. create a well in the center and add the apple cider (which may actually be water), oil, and vanilla. mix the whole thing together and then fold in the grated and chopped apple.

fill each muffin cup just below the rim. add a thick layer of the topping. my cookbook says to sprinkle the topping, but part of what I love about apple pie is the crusty top, so I say lay it on.

pop in the oven. 22 minutes later you should have lovely muffins that look like this:

of course, I still had dining room chairs that looked like this:


Tuesday, May 27, 2008

fresh berry granita

you will need:
  • 1 cup freshly squeezed orange juice (interpret "fresh" as you will)
  • 3/4 cup cold water
  • 1/2 cup agave nectar or honey (I used agave nectar because I hate honey)
  • 1/4 cup sugar
  • 2 generous teaspoons orange zest
  • 1 16-oz package of fresh strawberries, quartered and green bits removed
  • 2 8-oz packages of fresh raspberries

I have a lot of pictures for a very simple recipe. this is because strawberries are gorgeous things, particularly in late spring light. in a bowl, combine the orange juice, water, agave nectar, orange zest, half the strawberries and half the raspberries. blend these with your trusty hand mixer until almost smooth. (if you're using a blender, you can just put the ingredients directly in it.) add the rest of the fruit and continue to blend until the mixture is completely smooth. taste for sweetness. I found that it was plenty sweet and didn't need anything else, but you probably have a higher sweetness threshold than I do. you should add some more agave nectar.


pour the mix into a 9 x 13 METAL baking dish. (we'll return to the caps in a minute.) place the pan in the freezer so that it sits level. after an hour, the edges of the mix should be icy. use a fork and stir the icy edges towards the center of the dish, redistributing the mix. repeat every 30 minutes until the whole thing is solid.


now. in this picture, you're looking at a silicone dish. this sucker was great when I poured the mix into it, but when I tried to carry it across the kitchen to the freezer, the bottom gave way and granita liquid poured all over the white floor. and the fridge. that's not part of the recipe. learn from my mistakes!


once solid, take a fork and scrape the granita into icy flakes. pull the fork down the length of the pan until you have a dish of crystallized granita flakes. transfer the mix into a dish, cover tightly, and put it back into the freezer. once it's frozen in flake form, you have granita! you can scrape off portions into bowls and serve to impress your friends and family.

I must repeat: they will not be impressed if you spill the whole thing all over the floor. they will probably laugh at you and maybe help clean up but also probably smear some of your mess on you. and you'll deserve it for not listening to me.

Tuesday, May 20, 2008

when life gives you lemons, use a can opener

my roommate is moving out right now. she is taking everything. I don't think I realized how shoddy my kitchen collection was until she boxed her stuff up. I'm choosing to see this more as an opportunity to get the things I want rather than a problem. but this positive attitude can sometimes be challenging.

for instance, tonight I set about making dinner. the first thing I did was pull out a pot for the rice and check the refrigerator for vegetables. the second thing I did was get a cutting board for the red pepper and onion I had found. the third thing I did was realize that I don't own any cutting knives, so back into the fridge went the red pepper and onion. rice was still okay. I checked my cabinets. I had a can of beans, a can of coconut milk, and - perhaps most importantly - a can opener.


put the coconut milk (first pressing) into a large sauce pan. add 1.5 tablespoons of brown sugar and 2 teaspoons of red curry paste. stir the mixture over medium heat until the paste and brown sugar have dissolved and the coconut milk has become more liquid. this is a surefire sauce that is so quick, so easy, and so yummy that you won't really mind that you're just eating beans and rice for dinner.

Friday, May 9, 2008

slightly spicy asparagus risotto and tomato salad

Apparently gina marie and sarah emily are more fun than I am when I'm cooking ... this is them having fun in the kitchen :)


When I was making the penne last week, I was seduced by asparagus at the store, and also bought fresh tomatoes - forgetting that I needed canned ones! In order to deal with this problem, I decided to retry my chard risotto recipe but this time with asparagus - and spiced up a little because i had a cold and needed to clear my sinuses. The tomatoes had to go too, and I didn't want them to muddy up the risotto, so I raided the fridge for random things with which to make a salad. Sarah emily took the pictures, and wanted to make the point that gina marie was stirring and sarah emily was helping by drinking beer.


First, the risotto:

I chopped a white onion and the rest of the garlic in the house (equivalent of 3-4 cloves - they were little baby garlic pieces! I popped them in my soup pot with the bottom coated in olive oil with 4 shakes of my new favorite spice (from the pea soup recipe!) smoked paprika, and 4 shakes of cayenne. I stirred and put it on low heat.


Then I got started with the asparagus. I had almost a whole bunch of it. I cut off the the woody stems (more cut off on the thick ones, the thin ones you can just trim), and then cut what was left of the asparagus into about 6 pieces (each about a half an inch? I'm bad with measuring.)

I popped them into a saute pan covered with some olive oil and put it on low heat, stirring occasionally until the asparagus was a very bright green. Then I shut off the heat and let them sit in the pan.


When the onion-garlic-spices mixture had cooked for about 5 minutes and seemed soft, I added half a cup of risotto rice and stirred. Then I added 4 cups of vegetable stock (apparently the boxes come in 4 cup portions, so I used an unnecessary measuring cup - but how was I to know!) and turned the heat on medium high.


As the risotto cooked down, gina marie did a good job of stirring constantly, which meant we could keep the heat pretty high and the risotto wouldn't burn. when I tasted the rice and it was soft and done, I stirred in all the asparagus, just long enough to get it hot - less than a minute - and then turned off the heat on the risotto. The risotto was served with lots of parmesan cheese and with...

tomato salad:

gina marie chopped about 3 not-so-awesome supermarket vine ripened tomatoes. I stripped a small handful of cilantro and about 6 leaves of basil and chopped them up.


Then I peeled and chopped a carrot I found in the fridge, and combined the chopped herbs, carrots, and tomatoes. Finally, I made some dressing by whisking about 2 parts olive oil to one part balsamic vinegar with a generous pinch of salt and about a half a teaspoon of cracked pepper. I dressed the salad just before serving.

We seem to have forgotten to take any pictures of the tomato salad. we ate it too fast.

Here's the risotto.

Sometimes sarah emily pretends to pour honey on it:


Sometimes it is in its bowl:


Tuesday, April 22, 2008

lightly battered tofu (wwggwe)

to begin: W.W.G.G.W.E. stands for, "Which Will Go Great With Everything." I think wwggwe is an underlying philosophy of my cooking. garlic would fall into the wwggwe category, although it's not a recipe.

to continue: this recipe came to me via sean, who adopted it from his ex, who is - I hear - a formidable cook in her own right. if I were to judge based on this recipe, I would heartily agree.

you will need:
*one package of extra firm tofu, drained and pressed
*1/3 cup whole wheat flour
*1/3 cup cornmeal
*1/3 cup nutritional yeast
*salt to taste
*seasoned salt or garlic salt to taste
*plain soy milk
*olive oil
*a ziploc bag

combine the cornmeal, nutritional yeast, whole wheat flour, and salts in the ziploc bag. odds are that you'll want more salt than you'd think to put in, but that amount varies for everyone. if you're the sort of person that needs specifics, start with a tablespoon and go from there. seal the bag, shake so that everything is mixed, and set aside.

slice the tofu as you see fit. when dealing with a block, I like to slice it in half width-wise, creating two half-inch high rectangles. you can either make tofu "fingers" or cubes - whatever tickles your fancy. the important thing is to make sure your cut leaves the tofu with sides large enough to batter and brown. slivers won't work here, darlings.

pour the soymilk into a dish or tupperware container. you'll want enough in there so that you can coat the tofu. the exact amount will vary based on the size and shape of your dish. take about half of your tofu slices and coat all sides with soymilk. they don't need to be saturated, just wet enough so that the batter will stick. the tofu pieces go from the soymilk into the ziploc bag. pop the suckers in, seal the bag, and give it a good shake. you may want to do a little...massaging to make sure that every piece is getting coated on all sides.

heat a healthy amount of olive oil in a large, low saucepan. when the oil is hot, drop the tofu in. cubes can be done in two batches, tofu strips will need more than that. after a few minutes, flip one piece over. if it's golden brown on the bottom, flip the rest. cook for a few more minutes and then remove when the second side is a similarly wonderful golden brown color.

it make take a few tries to get the process down. I end up coating the second batch while the first one cooks, but if you have a partner in crime, you can have a continuous loop of coating and cooking. this recipe is so yummy. it is wwggwe for seri.

Wednesday, April 16, 2008

vegetarian tacos


That is the one picture I remembered to take. I wanted to make the point that there were a *lot* of ingredients.
---
I have been meaning to post about vegetarian tacos for ages - it's a signature dish of mine that, as usual, I got from my dad. Every time I would make them though, I forgot to take pictures.

I was all set when I made them last night (with some help from kristen and gina and margaritas from susan) before bluegrass at Cantab to take pictures so I could post. And I did take one picture. And then completely forgot about it (blame the margaritas).

I will try to post the one picture tonight, but in the meantime, I will post the recipe, since I don't make it that often. The thing about tacos is that they have a very dynamic cost/benefit analysis. They are waaay not worth making for one person, but the amount of work to make it for 6 or 8 people is almost the same as to make it for one person. So I like to do it for parties. Plus good leftovers.

Most of the taco process is just chopping. Everyone likes their own stuff for tacos. This is my basic list of cold accoutrement...

chopped fresh tomatoes
chopped scallions and cilantro mixed in a bowl
lettuce sliced into strips
grated extra sharp Cabot cheddar
home-made guacamole (kristen made it. it was excellent)
sometimes sour cream, but I don't think it's necessary

For the hot stuff:

one can of vegetarian refried beans (or refried black beans, of you're not doing whole black beans) - spread into a dish and put into the oven for a good long time at about 400 degrees.

once can of black beans, rinsed and drained. I heat this over the stove with 1/3 of a diced red pepper, and sprinkle some chopped cilantro over it at the end, because it's pretty.

tofu. This is the "meat" of the dish. I actually generally don't like tofu, but I think this is pretty good. To do it:

Grate half of a large, peeled carrot.
Dice one medium yellow onion.
Press one block of extra firm tofu. (To press tofu, I wrap it in paper towels and gently but firmly apply pressure, putting on more paper towels as they become soaked. Some people use cloth towels and lay a big book on top of it. whatever floats your boat!).

Start by saute-ing the diced onion in a liberal drizzle of olive oil. I use a stainless still skillet.
when the onions are about halfway to translucent, I add the tofu. You want to "scramble" the tofu - so you want the pieces to be rough, not diced, and not to little so that they get mushy. I usually cut the block in half with a knife, and then tear each half into three or four pieces with my hands and then drop it into the skillet. Then I use a spatula to roughly chop it up some more while mixing it with the onions. Let that cook until the onions get closer to translucent. Then combine the grated carrot into the skillet with the spatula. about three minutes later, you can add 2/3 a packet of taco seasoning (I usually use Old El Paso) and 2/3 cup of water. stir and let simmer on low heat until the water is absorbed, stirring occasionally.

In the meantime, you want to heat an 1/8 inch of corn oil in another skillet over very low heat. You will know the oil is hot enough if flicking a little water into it the water "jumps" back out. When the oil is nice and hot (turn on the hood vent - hot oil smokes and will set off your fire alarm!) use tongues to drop a corn tortilla in the oil. wait two seconds, flip the tortilla, and after about 3 more seconds, pull it out. when the tortilla is in the oil it should bubble and hiss a bit. If it doesn't it's not hot enough. Lay the tortilla on a stack of folded paper towels, and press down on the top of it with another stack of paper towels. This absorbs the oil so the tortillas aren't too greasy. when the towels are saturated you will need new ones, or else the oil won't get absorbed and the tortillas will stick to the paper towels and break. now fold the tortilla gently in half and set it on a platter.

Once you have your tortillas fried and your tofu has absorbed all the water, you are ready! put everything in pretty containers on the table and let people take what they want.

I am about to go eat my leftovers for lunch now!

(it's vegan without the cheese!!!)